In the field of precision machining, grinding is an important process that directly affects the dimensional accuracy and surface quality of products. The occurrence of scratches, burns, waviness, and feed marks is definitely not what machining personnel want to see.
But… if it really happens, how can it be resolved? That’s the focus of this article.
This article will analyze the underlying mechanical, operational, process, and environmental factors from how the problems occur to providing systematic solutions, serving as an important reference for grinding quality management.
Table of Contents
What are Grinding Scratches?
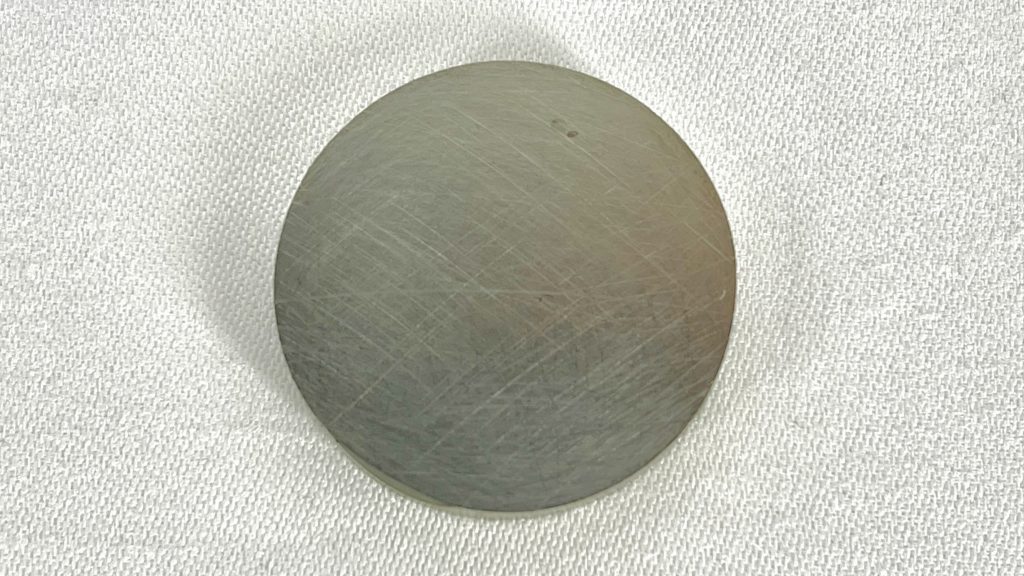
Scratches mainly arise from uneven cutting caused by the contact of abrasive grains with the workpiece surface.
When larger or protruding abrasive grains exist in the abrasive material, these grains will preferentially contact and penetrate the material surface during the application of pressure, leading to an increased depth of cut. Compared to other smaller abrasive grains, these protruding grains will create deeper grooves, which are scratches.
What are Grinding Burns?

When excessive heat is generated during the grinding process, it can lead to a phenomenon called grinding thermal damage (also known as grinding burn). This thermal damage reduces the hardness of the material and creates tensile residual stress on the workpiece surface, thereby reducing its fatigue life. If it occurs on critical parts subjected to dynamic loads, it may even cause serious structural failures.
Grinding burns can lead to the following problems:
- Workpiece thermal expansion and oxidation.
- Surface grinding burns leading to reduced workpiece performance.
- Cracks and machining defects.
- Excessive grinding heat can cause microcracks or even microcracks during or after machining, further weakening the structural integrity of the workpiece.
※ Extended Reading: Why does heat occur when grinding? How important is it to control heat for grinding wheels and workpieces?
Common Situations Leading to Grinding Scratches
- Mechanical Vibration
When the machine or fixture vibrates, it affects the unstable contact between the grinding wheel and the workpiece, causing irregular waviness or scratches on the ground surface, thereby affecting machining accuracy and surface quality. - Scratches on the Workpiece
If the workpiece already has scratches or dents before machining, these defects are not easily completely removed during grinding and may even be further enlarged, causing surface defects in the finished product. - Inappropriate Grinding Wheel Bond Strength
If the bond strength is too high, abrasive grains are not easily shed, leading to excessive cutting force and heat generation; if the bond strength is too low, abrasive grains are easily shed prematurely, reducing grinding wheel life and affecting machining stability, thus leading to surface defects. - Grinding Wheel Clogging or Glazing
When the grinding wheel surface is blocked by the material removed during cutting (clogging) or the abrasive grains become blunt (glazing), the grinding action is weakened, producing a rubbing effect. This not only easily causes scratches but may also lead to overheating or surface damage. - Poor Workpiece Accuracy
If the workpiece has not been well-machined or poorly positioned beforehand, it will cause dimensional deviations and surface unevenness, thereby affecting the subsequent grinding quality and leading to problems such as scratches, burns, or out-of-tolerance dimensions. - Grinding Wheel Burns and Cracks
When the grinding pressure is too high or cooling is insufficient, high heat will be generated, causing the workpiece surface to burn or the hardened layer to degrade, known as grinding burn; if the grinding wheel quality is poor or the usage method is incorrect, it may also lead to cracking, thereby damaging the workpiece or even causing safety problems.
※ This section will mainly focus on an in-depth discussion of the abnormal conditions of mechanical vibration, waviness, scratches on the workpiece, and burns. The next chapter will analyze the causes of these abnormalities and provide solutions.
Causes and Solutions for Mechanical Vibration and Waviness Abnormalities
We can determine the cause based on the pattern and phenomenon of the waviness.
| Abnormal conditions | Causes | Solution | |
| Waviness | Displays waveforms with the same interval | Mechanical Vibration | 1.Check the stability of the machine base installation to confirm if there is looseness or unevenness. 2. Replace or adjust belts and gears. 3. Check the balance between the spindle and the motor to prevent eccentricity. 4. Re-inspect all moving parts to confirm the smoothness and stability of slideways, bearings, etc. |
| Grinding Wheel Imbalance | 1. Perform precise dynamic balancing of the grinding wheel. 2. After grinding wheel dressing is completed, perform balance correction again. 3. Do not allow the grinding wheel to stop rotating before the grinding fluid has completely dissipated. | ||
| Out-of-Round Grinding Wheel | Dressing operation must be performed before and after balancing the grinding wheel. | ||
| Grinding Wheel Too Hard | 1. Select a grinding wheel with a lower bond strength. 2. Switch to a grinding wheel with coarser grit. 3. Appropriately reduce the grinding wheel speed. 4. Reduce the depth of cut for each pass. | ||
| Narrow, Deep, and Regular Phenomena | Grinding Wheel Too Coarse | Switch to a grinding wheel with finer grit. | |
| Irregular Phenomena | Poor Workpiece Setup | 1. Ensure the workpiece is firmly clamped, eliminating any looseness during the clamping process. 2. Check and correct the position and accuracy of the center pin. 3. Properly lubricate the contact areas with the workpiece. | |
| Workpiece Imbalance | 1. Select and install appropriate balancing tools according to the characteristics of the workpiece. 2. Use large grinders for machining to provide more stable support and higher accuracy. | ||
| Poor trimming | 1. Use sharp diamonds for dressing. 2. For dulled diamond particles, reset them to restore their sharpness. 3. Check if the dresser and its clamping device are loose. 4. The overhang length of the dresser should be appropriate, avoiding excessive length. | ||
| Simultaneous Occurrence of Regular and Irregular Phenomena | Vibration or Looseness of the Cross-Slide Carriage | 1. Check the running condition of the cross-slide bearings. 2. Regularly add an appropriate amount of lubricating oil to the cross-slide bearings. 3. Inspect all components of the feed mechanism. | |
| Long and Widely Spaced Phenomena | Bent or Vibrating Grinding Wheel Spindle | 1. Check the roundness of the grinding wheel spindle. 2. Check for bending of the grinding wheel spindle. | |
| Short, Dense, and Evenly Spaced Phenomena | Loose Grinding Wheel Spindle Bearings | 1. Ensure that the bearings are securely tightened during assembly. 2. If bearing damage or abnormalities are found, repair or replace them immediately. 3. Reduce the peripheral speed of the grinding wheel. | |
| Wide and Uneven Irregular Marks | Grinding Wheel Too Soft | Use a grinding wheel with a harder bond strength. | |
| Widely Distributed Spots | Grinding Wheel Glazing | 1. Perform precise balance adjustment of the grinding wheel and recalibrate after dressing. 2. Regularly remove oil stains and chips from the grinding wheel surface and its base. | |
Causes and Solutions for Burns and Feed Mark Abnormalities
We determine the cause of the abnormality based on the pattern on the workpiece.
| Abnormal conditions | Causes | Solutions | |
| Burns, feed marks | Small spiral marks | Poor trimming | 1. If the grinding wheel dresser is broken, replace it immediately. 2. During dressing, the lateral feed rate should be kept slow. 3. During dressing, the diamond dresser should be kept at a downward tilt of 15 degrees and a lateral tilt of 30 degrees. 4. Ensure the holder is firmly clamped. 5. The depth of cut for each dressing pass should be controlled within a shallow range. 6. Never allow the holder to touch the grinding wheel. 7. Dressing should start from the edge of the grinding wheel, not the middle, which helps maintain the uniformity and stability of the grinding wheel. 8. During the final dressing pass, the lateral feed direction should be opposite to the lateral feed direction of grinding. 9. During dressing, the lateral movement speed of the diamond should be kept uniform. 10. The edges of the grinding wheel should be rounded (chamfered). |
| Poor operation | 1. Ensure the grinding wheel working surface and the workpiece surface remain parallel and aligned to prevent the grinding wheel edge from abnormally cutting into the workpiece due to angular deviation. 2. Appropriately reduce the pressure of the grinding wheel on the workpiece. 3. Increase the workpiece support structure or stabilizing fixture. 4. Slow down the lateral feed rate of the grinding wheel. | ||
| Spiral feed marks | Grinding wheel flange contact | The edges of the grinding wheel should be rounded (chamfered). | |
| The abrasive grain size of the grinding wheel for coarse grinding and the grinding wheel for fine grinding is too different | 1. In the rough grinding stage, it is recommended to use a grinding wheel with finer grit. 2. In the fine grinding stage, a coarser grinding wheel can be used, gradually reducing the infeed and lateral feed rate until no sparks are generated during machining. | ||
| Too rough | The depth of dressing should be reduced, and the lateral feed rate should also be decreased. | ||
| Improper grinding method | When starting grinding, a faster lateral feed rate should be used to quickly remove the deep marks and machining patterns left by the previous rough grinding. As grinding approaches completion, the lateral feed rate should be reduced for fine grinding using a spark-out method. | ||
| Center line inaccurate | Precisely align the center line of the grinding wheel and the workpiece. | ||
| Poor trimming | 1. Set the dresser at a downward tilt of 5 degrees. 2. Round (chamfer) the edges of the grinding wheel. | ||
| Isolated and deep scars | Improper dressing | 1. Use a sharp grinding wheel dresser for dressing. 2. After dressing is complete, thoroughly clean the grinding wheel surface with a stiff bristle brush. | |
| Coarse abrasive or foreign debris left on the grinding wheel surface | 1. Thoroughly dress and repair the grinding wheel. 2. If the grinding wheel is severely damaged or worn, it should be replaced immediately. | ||
| Deterioration of organic grinding wheels | 1. Avoid using chemical solution type coolants; it is recommended to switch to soluble type coolants to reduce chemical damage to the grinding wheel and workpiece surfaces. 2. The alkaline concentration in the coolant should be controlled below pH 9. 3. During summer processing, measures should be taken to prevent the coolant temperature from rising. | ||
| Severe abrasive shedding | Select a grinding wheel with a higher bond strength. It is recommended to consult our sales team for recommendations. | ||
| Grinding wheel rim loose | 1. When installing the grinding wheel, place cardboard shims between the grinding wheel and the flange. 2. Tighten the fixing screws symmetrically and evenly. | ||
| Irregular burn marks of varying lengths and widths | The coolant is not clean | 1. Clean the cooling tank regularly. 2. Check the functional status of the filters. 3. After grinding wheel dressing or replacement, thoroughly rinse the inside of the guard. | |
| filthy | 1. Maintain the cleanliness of the factory environment and air. 2. Install dust collection equipment. | ||
| Fishtail shape | Poor operation | 1. Avoid pressing the grinding wheel excessively against the workpiece. 2. Operate the grinding wheel with a gentler and sharper cutting effect. 3. The coolant should be continuously, evenly, and abundantly supplied to the grinding area. | |
※ Replacing the Grinding Wheel
If you want to replace the grinding wheel, it is recommended that you provide us with the material of your current workpiece for evaluation so that we can recommend the most appropriate choice.
If you don’t know how to provide the model number, you can also send the grinding wheel to us for inspection.
Conclusion
Surface abnormalities such as grinding scratches and burns mostly originate from unstable mechanical equipment, improper workpiece clamping, poor grinding wheel selection or dressing methods, and improper cooling system management. If these problems are not detected and improved in time, they will not only reduce machining quality and accuracy but may also lead to equipment damage and unstable production quality. Therefore, a comprehensive prevention and improvement strategy should be established from various aspects such as equipment maintenance, setting process conditions, operating skills, and on-site environmental management to effectively improve the stability of grinding operations and the reliability of products.
Action
- How to choose grinding wheel>>>How to Choose Between Diamond Wheels and CBN Wheels?
- Correctly understand the situation of grinding abnormality>>Causes of Grinding Abnormalities? How to Address Them?
- How to choose tools for cutting bonded grinding wheels>>How to Dress Grinding Wheels with Different Bond Type
- Is the current grinding wheel wear normally>>>What is the current status of the grinding wheel? – Electroplated Grinding Wheel Section
- How to dress a grinding wheel>>Grinding Wheel Dressing and Sharpening Methods
- Grinding wheel dressing in two stages>>What Are Truing and Dressing of Grinding Wheels?
- How to choose tools for cutting bonded grinding wheels>>How to Choose Grinding Wheel Dressing Tools
- Different grinding states of cutting edge>>In-depth understanding of grinding wheel cutting edge shapes, variations, and self-sharpening mechanisms
- Implement>>Diamond and boron nitride grinding wheels, polishing abrasives, polishing equipment, polishing tools, diamond dressing tools
- How to dress different bonding agents>>How to Dress Grinding Wheels with Different Bond Types
- Review
We offer customized adjustments to the grinding process, tailored to meet processing requirements for maximum efficiency.
After reading the content, if you still don’t know how to select the most suitable option,
Feel free to contact us and we will have specialist available to answer your questions.
If you need customized quotations, you’re also welcome to contact us.
Customer Service Hours: Monday to Friday 09:00~18:00 (GMT+8)
Phone: +8867 223 1058
If you have a subject that you want to know or a phone call that is not clear, you are welcome to send a private message to Facebook~~
Honway Facebook: https://www.facebook.com/honwaygroup
You may be interested in…
[wpb-random-posts]